5: Field Types
Form Management
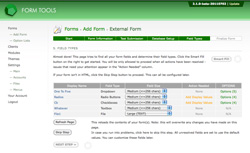
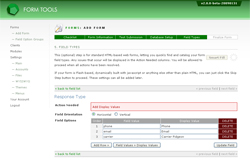
Almost there! Step 5 gets down to the nitty gritty: specifying the field types, their value(s) and the how much space should be allocated in the database for each field. The page should look something like the screenshot to the right.
Once the page has fully loaded, click the "Smart Fill" button.
How it works
You form page(s) are loaded in hidden iframe(s) in the page. If the form was on a different server, temporary copies are created locally so that the javascript can read them. When you click "Smart Fill" button, the page parses your form page(s) and tries to determine (a) their field type (dropdown, radio buttons etc) and (b) any multiple-select options they may have; namely: radios, dropdowns and checkboxes all have multiple options. The script figures all these out and displays them.
From a coding standpoint, this is quite a complicated page and there are numerous things that could go wrong. For instance, if your webpage contains errors or is malformed, the Smart Fill option may not be able to run properly. Because of this, there are various safeguards in place so recommend courses of action. One such option is that if one or more of your form fields cannot be found, the page will provide you with the option of manually uploading copies of your form for it to be parsed directly. But for whatever reason, in case you cannot complete the page, you can always click the "Skip Step" button to bypass the page. You can always edit the form later to customize the fields then.
Limitations: checkboxes and radio buttons
Due to the nature of HTML, checkboxes and radio buttons have their labels located outside of the input field elements: technically they could appear anywhere in the webpage. For instance:
<!-- field types with their labels found outside of the element -->
<input type="radio" name="r1" /> My first radio!
My second radio: <input type="radio" name="r2" />

<input type="checkbox" name="c1" /> My first checkbox
My second checkbox: <input type="checkbox" name="c2" />

<!-- field types with their labels found inside the element -->
<select name="s">
	<option value="one">One</option>
	<option value="two">Two</option>
	<option value="three">Three</option>
</select>
Because of this, the Smart Fill feature doesn't pre-fill the display texts for checkboxes or radio buttons, since it doesn't know where to find them! Dropdowns always have their labels found in the same place, so they CAN be pre-filled.
h5>Field SizesThe field size column specifies how much storage should be allocated for each field. Always make sure there's enough space! If you don't the form submission data will be truncated when it first gets added to the database!
Users familiar with earlier versions of Form Tools may notice a couple of changes here:
- The list of available field sizes is different, depending on the field type. For some field types (like textareas) it would make sense to be able to allocated only 5 or 20 characters, whereas other field types (like textboxes) it would.
- There are two new sizes: 1 char and 2 chars. These are included because sometimes you only need that much space.

