Adding Internal Forms
Form Management
Adding Internal Forms
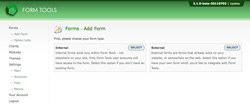
To add an Internal form, just click on the Add Form link in the left navigation menu. There, select the Internal form. That will open up a page where you create your new Internal form.
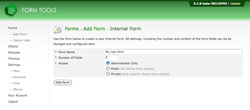
The options are this page are very basic: you just enter the form name, how many fields it should have, and what permissions it should have (admin only, public or private). And don't worry! All these settings can be changed later.
Lastly, click the "Add form" button. That's it! You now have a blank form created which you can start adding data through. That took, what... 10 whole seconds?
So now what?
Next you'll want to configure the form to store the information you want. What I'd do is click on the toggle icon at the top right of the screen (it's grey and has two icons side-by-side). That icon lets you switch between editing the form and viewing the submission data. It's a very convenient way to toggle back and forth to see how the changes you're making to the form configuration is being reflected when editing your form submissions.
On the Submission Listing page, click "Add" to add a new submission to your form, then click "back to search results". That gives you an idea of what data is currently being stored. What you'll want to do now is click the toggle icon again, and go to the Edit Form -> Fields tab. There, change the field names and field types to customize what data your form is storing. Just keep experimenting. At this stage, your form doesn't have any data, so you can add and delete fields without having to worry about losing any existing submission data. Play around with it! If you get stuck on anything, give this section a read over. It explains what all the various options are when editing your forms.

